修订历史记录
| 日期 | 版本 | 说明 | 作者 |
| 2019-4-9 | 1.0 | ** | |
| 2019-4-11 | 1.1 | ** | |
软件包
链接:https://pan.baidu.com/s/1xZxWRwiN1hSxh0g8uJP8fQ
提取码:itpc
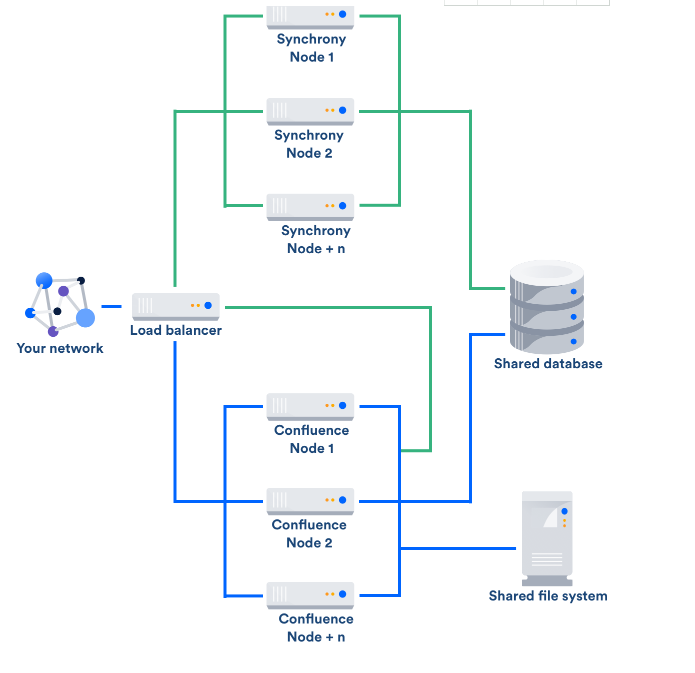
拓扑图
系统环境
1. 服务器基本信息
| 服务器ip | 操作系统版本 | 角色 | 管理员账户 | 备注 |
| 10.5.0.90 | Centos 7.4 | 前端节点1 | root/* | |
| 10.5.0.91 | Centos 7.4 | 前端节点2 | root/* | |
| 10.5.0.92 | Centos 7.4 | 前端节点3 | root/* |
2.数据库信息
| 数据库VIP | 类型 | 数据库名 | 账号 | 密码 | 备注 |
| 10.2.2.53 | MSSQL | confluence_cluster | confluence | * |
3. 共享存储挂载信息
| 挂载类型 | 挂载IP | 挂载目的主机IP | 挂载路径 | 挂载权限 | 空间大小 | 备注 |
| ISCSI | 10.2.55.5 | 10.5.0.90 | /home/confluence_cluster | 777 | 1T | |
| ISCSI | 10.2.55.5 | 10.5.0.91 | /home/confluence_cluster | 777 | 1T | |
| ISCSI | 10.2.55.5 | 10.5.0.92 | /home/confluence_cluster | 777 | 1T |
4. 授权信息
| 服务器ID号 | KEY |
| BXDS-****-QL86-FJ1R | * |
节点安装配置
各节点环境配置
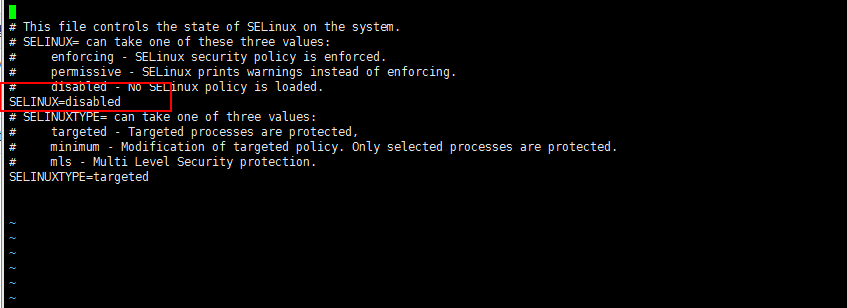
- 关闭selinux

- 关闭防火墙
systemctl stop firewalld.service
systemctl disable firewalld.service-
取消linux打开的文件数量限制
为了使服务器重启设置还能生效, 采取永久改变的方法。
vim /etc/security/limits.conf在文档最后添加
*  soft nofile 65535
* hard nofile 65535- 安装iscsi客户端
[root@confluence01 ~]# yum install iscsi-initiator-utils设置开启自启
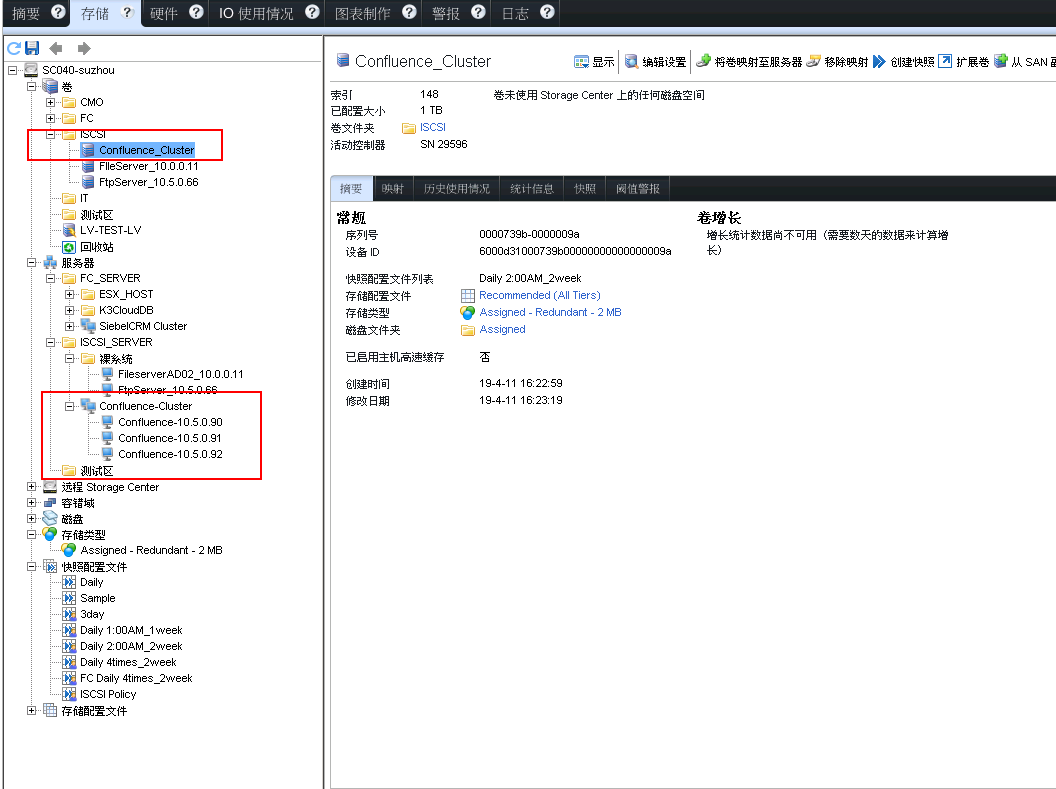
systemctl enable iscsi.service- 在DELL存储上划分卷并分配给3台节点。
- 配置多路径
安装多路径软件
yum install device-mapper-multipath
启动服务
/bin/systemctl start multipathd.service
设置开机自启
systemctl enable multipathd.service
创建multipath.conf配置文件
cp /usr/share/doc/device-mapper-multipath-0.4.9/multipath.conf /etc/
修改multipath.conf配置文件,按如下要求:
multipath也会为本地的磁盘生成相应的dm设备,所以需要在multipath.conf中将本地磁盘加入到黑名单:
blacklist {

wwid 26353900f02796769

devnode "^(ram|raw|loop|fd|md|dm-|sr|scd|st)[0-9]*"

devnode "^hd[a-z]"

devnode "^sda[0-9]?"

}
固定multipath设备的命名:
通过wwid和设备别名一一对应的方式固定multipath设备的名称,这些和别名对应的设备会被创建到/dev/mapper/目录下,使用时直接使用这个目录的设备
wwid值可以通过multipath -ll (建议可以查看的信息比较详细) 或者more /etc/multipath/bindings查看,如下:

排除黑名单
blacklist_exceptions {
wwid "36000d31000739b00000000000000009a"
}
设置别名
multipaths {
multipath {
alias DM-1T
uid 1000
gid 1000
wwid "36000d31000739b00000000000000009a"
mode 0777
}
}
配置完成之后,重启multipathd服务,使用下面的命令清空已有的multipath记录
multipath -F
然后使用multipath -v2重新扫描设备,这时会在/dev/mapper/目录下生成和别名对应的设备文件
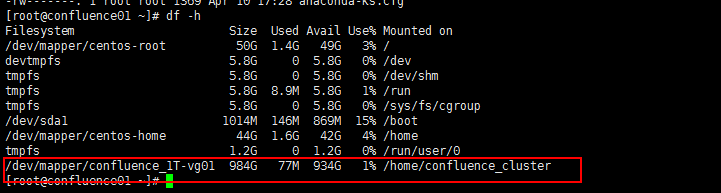
- 格式化分区并挂载到/home/confluence_cluster 具体参照我的另一篇文章(gfs集群文件挂载):
2.各节点安装JAVA
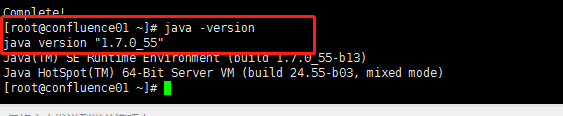
confluence的运行是依赖java环境的,需要安装jdk并且要是1.7以上版本,拷贝jdk到服务器根目录进行安装:
[root@test-vm03 opt]# rpm -ivh jdk-7u55-linux-x64.rpm确定已安装
java -version
节点1
节点2

节点3

3.节点1 安装confluence
将上面两个包下载到本机的/home目录下,给二进制文件授执行权限,然后安装
[root@bogon home]# chmod +x atlassian-confluence-6.3.1-x64.bin
[root@bogon home]# ./atlassian-confluence-6.3.1-x64.bin
执行可执行文件进行confluence的安装
[root@yeebian ConfluenceInstall]# ./atlassian-confluence-6.3.1-x64.bin#执行安装并根据提示输入,选择默认安装。
Unpacking JRE ...
Starting Installer ...
Apr 20, 2017 6:47:35 PM java.util.prefs.FileSystemPreferences$1 run
INFO: Created user preferences directory.
Apr 20, 2017 6:47:35 PM java.util.prefs.FileSystemPreferences$2 run
INFO: Created system preferences directory in java.home.
This will install Confluence 6.3.1 on your computer.
OK [o, Enter], Cancel [c]
o ## 默认回车
Choose the appropriate installation or upgrade option.
Please choose one of the following:
Express Install (uses default settings) [1], Custom Install (recommended for advanced users) [2, Enter], Upgrade an existing Confluence installation [3]
1
See where Confluence will be installed and the settings that will be used.
Installation Directory: /opt/atlassian/confluence ## 安装目录默认路径
Home Directory: /var/atlassian/application-data/confluence ## 家目录默认路径
HTTP Port: 8090 ## http默认端口8090
RMI Port: 8000
Install as service: Yes
Install [i, Enter], Exit [e]
i ## 输入 i,回车
Extracting files ...
Please wait a few moments while Confluence starts up.
Launching Confluence ...
Installation of Confluence 6.3.1 is complete
Your installation of Confluence 6.3.1 is now ready and can be accessed via
your browser.
Confluence 6.3.1 can be accessed at http://localhost:8090
Finishing installation ...(4)启动confluence
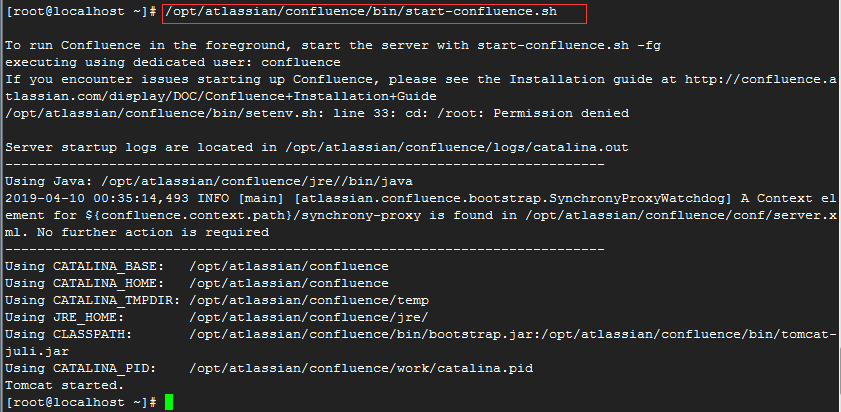
[root@localhost ~]# /home/atlassian/confluence/bin/start-confluence.sh
查看默认端口8090

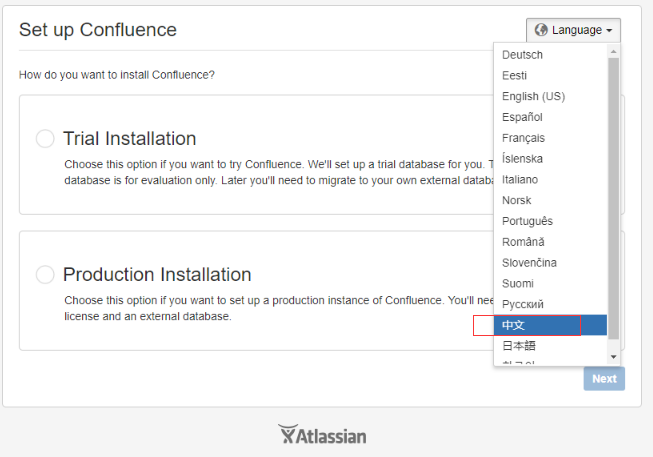
(5)浏览器confluence ,http://10.5.0.90:8090,第一步选择中文,下一步
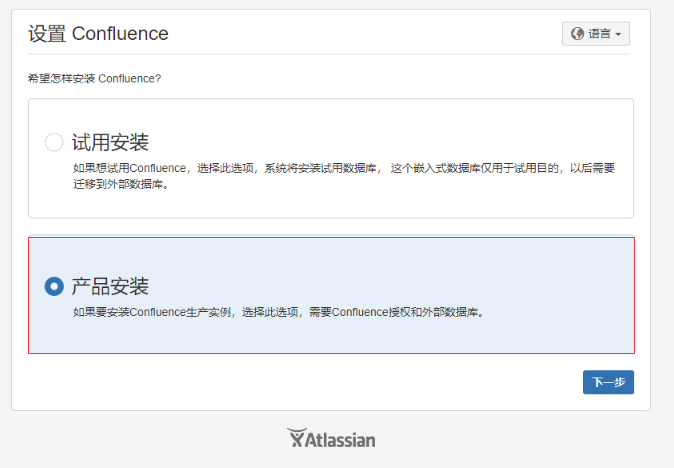
(6)选择“产品安装”,下一步
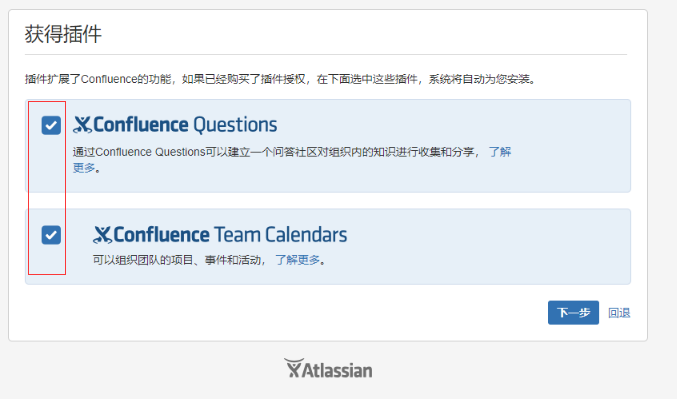
(7)安装下面两个插件,下一步
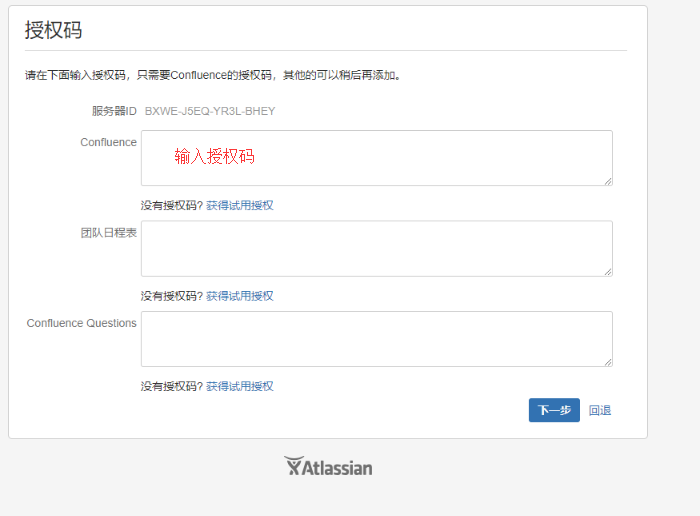
(8)试用confluence
替换/home/atlassian/confluence/confluence/WEB-INF/lib/atlassian-extras-decoder-v2-3.2.jar
atlassian-extras-decoder-v2-3.2.jar
替换 /home/atlassian/confluence/confluence/WEB-INF/atlassian-bundled-plugins/atlassian-universal-plugin-manager-plugin-2.21.jar
atlassian-universal-plugin-manager-plugin-2.22.1.jar
替换后通过ID,进行授权码生成(底部与我联系)。
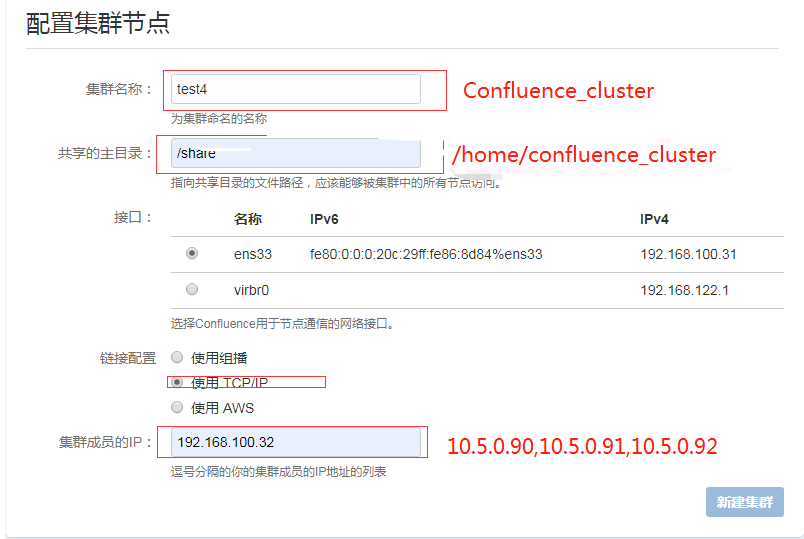
(9)由于上一步输入的是confluence data center版本的授权,下面开始新建集群
此时涉及到一个共享主目录,上面已经创建了一个 /home/confluence_cluster共享目录
(10)配置数据库,这里选择MSSQL
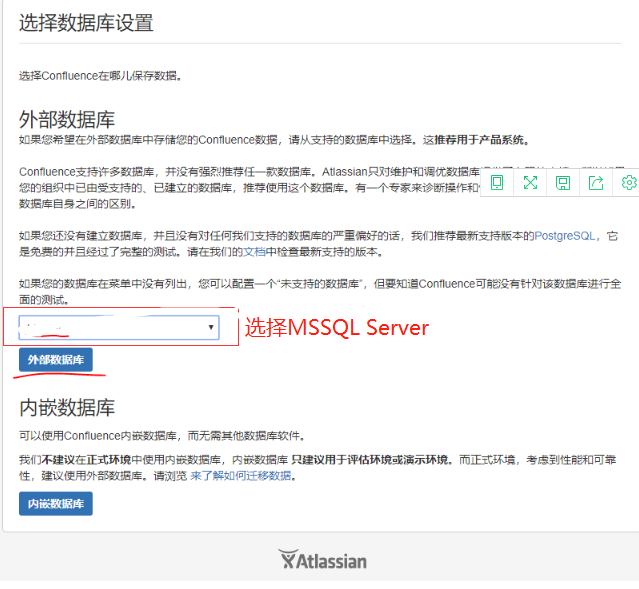
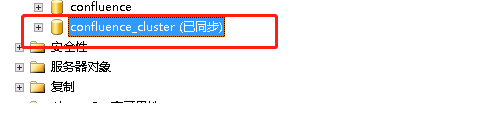
在10.2.2.53上创建confluence数据库并执行以下语句:
ALTER DATABASE confluence_cluster
SET READ_COMMITTED_SNAPSHOT ON
WITH ROLLBACK IMMEDIATE;

ALTER DATABASE confluence_cluster COLLATE SQL_Latin1_General_CP1_CS_AS;
(11)配置数据库
类驱动器名称:net.sourceforge.jtds.jdbc.Driver
数据库URL:jdbc:jtds:sqlserver://10.2.2.*:1433/confluence_cluster
用户名:confluence
密码: *

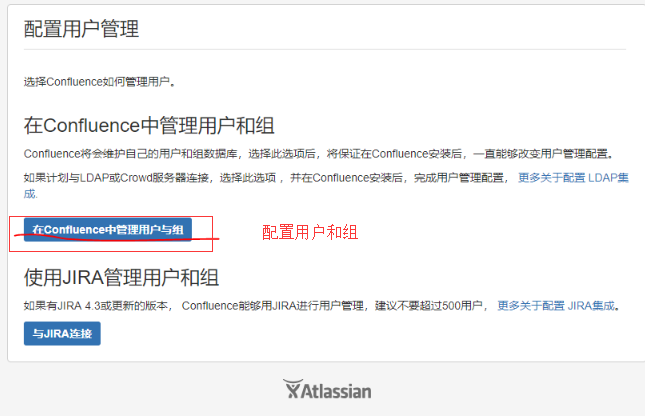
(12)confluence中配置用户和组,设置一个管理员账户和密码
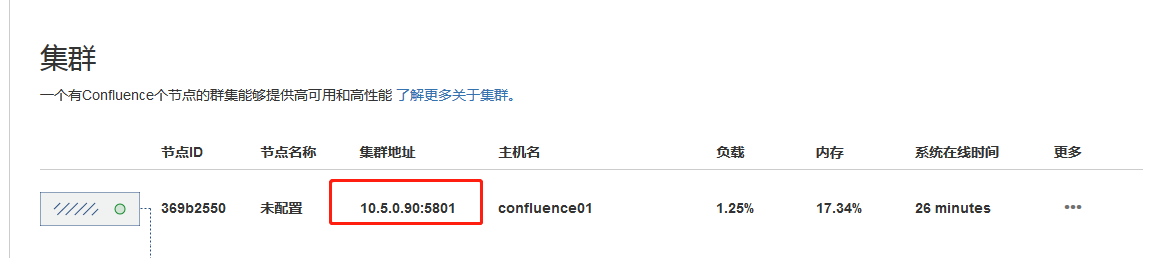
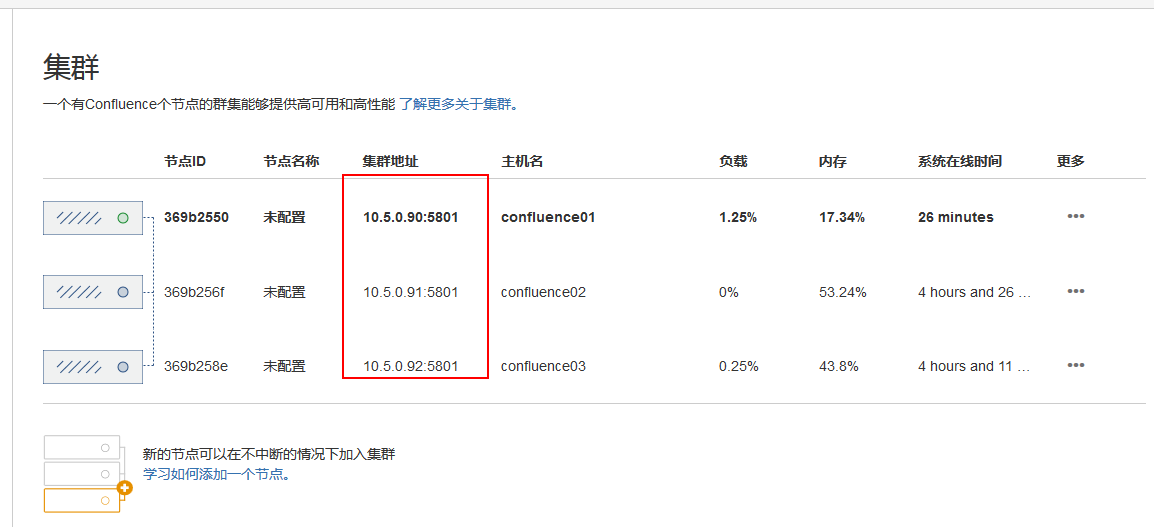
(13)至此节点1 的工作完成了,进入管理-集群 ,看到此时集群状态是只有节点1在集群中,下面开始操作节点2,使其加入confluence集群
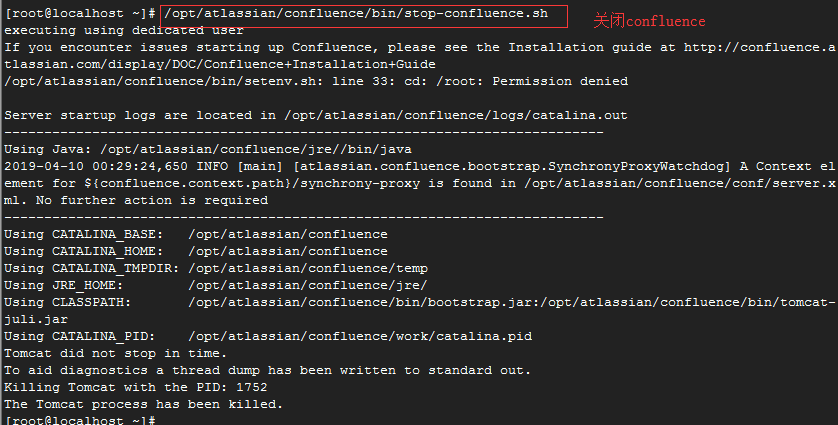
(14)节点1关闭confluence
节点2,3安装配置
(1)节点2,3验证共享目录/share的挂载情况

(2)从节点1拷贝confluence的安装路径以及家目录到节点2和节点3
scp -rp /home/atlassian/ root@10.5.0.91:/home/

scp -rp /home/atlassian/ root@10.5.0.92:/home/
并分别设置权限
chown -R confluence /home/atlassian/confluence/temp/
chown -R confluence:confluence /home/atlassian/application-data/confluence/
chown -R confluence /home/atlassian/confluence/logs/
chown -R confluence /home/atlassian/confluence/work
(3)验证节点是否正常运行
分别按序启动节点2、节点3(不可以同时启动)
(6)等待全部启动后,访问各自URL,确保度都可以正常访问,并观察集群状态
http://10.5.0.90:8090
http://10.5.0.91:8090
http://10.5.0.92:8090
四 集成oa认证
(1)替换 /home/atlassian/confluence/confluence/WEB-INF/web.xml
备注:
- https://oa.test.com/confluence 改成自己的confluence访问地址
- https://sso.test.com:8443/CasServer 改成自己的cas服务器
特别注意下面配置
<!-- CAS:START - Java Client Filters -->

<context-param>

<param-name>ignorePageString</param-name>
<param-value>
/plugins/servlet/streams*,
/rest/applinks/**/*,
/rest/capabilities/**,
/plugins/servlet/oauth/**,
/rest/gadgets/1.0/**,
/rest/mywork/**,
/rest/knowledge-base/**,
/rest/prototype/**
</param-value>
</context-param>

<filter>
<filter-name>CasSingleSignOutFilter</filter-name>
<filter-class>com.test.sso.atlassiansso.KDSingleSignOutFilter</filter-class>
<init-param>
<param-name>casServerUrlPrefix</param-name>
<param-value>https://oatest.test.com/CasServer</param-value>
</init-param>
</filter>
<filter>
<filter-name>CasAuthenticationFilter</filter-name>
<filter-class>com.test.sso.atlassiansso.KDAuthenticationFilter</filter-class>
<init-param>
<param-name>casServerLoginUrl</param-name>
<param-value>https://sso.test.com:8443/CasServer/login</param-value>
</init-param>
<init-param>
<param-name>serverName</param-name>
<param-value>https://oa.test.com/confluence</param-value>
</init-param>
</filter>
<filter>
<filter-name>CasValidationFilter</filter-name>
<filter-class>com.test.sso.atlassiansso.KDCas20ProxyReceivingTicketValidationFilter</filter-class>
<init-param>
<param-name>casServerUrlPrefix</param-name>
<param-value>https://sso.test.com:8443/CasServer</param-value>
</init-param>
<init-param>
<param-name>serverName</param-name>
<param-value>https://oa.test.com/confluence</param-value>
</init-param>
<init-param>
<param-name>redirectAfterValidation</param-name>
<param-value>true</param-value>
</init-param>
</filter>

<filter-mapping>
<filter-name>CasSingleSignOutFilter</filter-name>
<url-pattern>/*</url-pattern>
</filter-mapping>

<filter-mapping>
<filter-name>CasAuthenticationFilter</filter-name>
<url-pattern>/*</url-pattern>
</filter-mapping>

<filter-mapping>
<filter-name>CasValidationFilter</filter-name>
<url-pattern>/*</url-pattern>
</filter-mapping>

<!-- CAS:END -->
<!-- CAS:START - Java Client Single Sign Out Listener -->
<listener>
<listener-class>org.jasig.cas.client.session.SingleSignOutHttpSessionListener</listener-class>
</listener>
<!-- CAS:END -->3、替换 /home/atlassian/confluence/confluence/WEB-INF/classes/seraph-config.xml
特别注意修改下面配置
<init-param>
<param-name>login.url</param-name>
<!--
<param-value>/login.action?os_destination=${originalurl}&permissionViolation=true</param-value>
-->
<param-value>https://sso.test.com:8443/CasServer/login?service=${originalurl}</param-value>
</init-param>
<init-param>
<param-name>link.login.url</param-name>
<!--
<param-value>/login.action</param-value>
-->
<param-value>https://sso.test.com:8443/CasServer/login?service=${originalurl}</param-value>
</init-param>
<init-param>
<param-name>cookie.encoding</param-name>
<param-value>cNf</param-value>
</init-param>
<init-param>
<param-name>login.cookie.key</param-name>
<param-value>seraph.confluence</param-value>
</init-param>
<!--only basic authentication available-->
<init-param>
<param-name>authentication.type</param-name>
<param-value>os_authType</param-value>
</init-param>
<!-- Invalidate session on login to prevent session fixation attack -->
<init-param>
<param-name>invalidate.session.on.login</param-name>
<param-value>true</param-value>
</init-param>
<!-- Add names for session attributes that must not be copied to a new session when the old one gets invalidated.
Currently it is empty (i.e. all attributes will be copied). -->
<init-param>
<param-name>invalidate.session.exclude.list</param-name>
<param-value></param-value>
</init-param>
</parameters>
<rolemapper class="com.atlassian.confluence.security.ConfluenceRoleMapper"/>
<controller class="com.atlassian.confluence.setup.seraph.ConfluenceSecurityController"/>
<!-- Default Confluence authenticator, which uses the configured user management for authentication. -->
<!--
<authenticator class="com.atlassian.confluence.user.ConfluenceAuthenticator"/>
-->
<!-- CAS:START - Java Client Confluence Authenticator -->
<authenticator class="org.jasig.cas.client.integration.atlassian.ConfluenceCasAuthenticator"/>
<!-- CAS:END -->
<!-- Custom authenticators appear below. To enable one of them, comment out the default authenticator above and uncomment the one below. -->
<!-- Authenticator with support for Crowd single-sign on (SSO). -->
<!-- <authenticator class="com.atlassian.confluence.user.ConfluenceCrowdSSOAuthenticator"/> -->
<!-- Specialised version of the default authenticator which adds authenticated users to confluence-users if they aren't already a member. -->
<!-- <authenticator class="com.atlassian.confluence.user.ConfluenceGroupJoiningAuthenticator"/> -->
4、在 /home/atlassian/confluence/confluence/WEB-INF/classes/ 新增xwork.xml
5、在 /home/atlassian/confluence/confluence/WEB-INF/lib/ 放入如下三个文件
需要和CAS服务器集成使用
cas-client-integration-atlassian-3.4.1.jar
atlassiansso-0.0.1-SNAPSHOT.jar
6、重启confluence服务,并测试OA登录
# /home/atlassian/confluence/bin/stop-confluence.sh
# /home/atlassian/confluence/bin/start-confluence.sh
五 反向代理配置
(1)修改httpd.conf
取消注释反向代理和负载均衡模块
LoadModule proxy_module modules/mod_proxy.so
LoadModule lbmethod_bybusyness_module modules/mod_lbmethod_bybusyness.so
LoadModule lbmethod_byrequests_module modules/mod_lbmethod_byrequests.so
LoadModule lbmethod_bytraffic_module modules/mod_lbmethod_bytraffic.so
LoadModule lbmethod_heartbeat_module modules/mod_lbmethod_heartbeat.so
LoadModule proxy_ajp_module modules/mod_proxy_ajp.so
LoadModule proxy_balancer_module modules/mod_proxy_balancer.so附件:httpd.conf
(2)修改httpd-vhosts.conf
添加如下代理
Header add Set-Cookie "ROUTEID=.%{BALANCER_WORKER_ROUTE}e; path=/" env=BALANCER_ROUTE_CHANGED

<Proxy balancer://confluence>
BalancerMember http://10.5.0.90:8090/confluence route=90
BalancerMember http://10.5.0.91:8090/confluence route=91
BalancerMember http://10.5.0.92:8090/confluence route=92
ProxySet lbmethod=byrequests
ProxySet stickysession=ROUTEID
</Proxy>

ProxyPass /confluence balancer://confluence
ProxyPassReverse /confluence balancer://confluence(3) 修改ssl.conf 配置文件
Listen 443 https

AddType application/x-x509-ca-cert .crt
AddType application/x-pkcs7-crl    .crl

SSLPassPhraseDialog exec:/usr/libexec/httpd-ssl-pass-dialog

SSLSessionCache         shmcb:/run/httpd/sslcache(512000)
SSLSessionCacheTimeout  1200

SSLRandomSeed startup file:/dev/urandom  256
SSLRandomSeed connect builtin


SSLCryptoDevice builtin
#SSLCryptoDevice ubsec

##
## SSL Virtual Host Context
##

<VirtualHost _default_:443>


ErrorLog logs/ssl_error_log
TransferLog logs/ssl_access_log
LogLevel warn

#   SSL Engine Switch:
#   Enable/Disable SSL for this virtual host.
SSLEngine on

#   SSL Protocol support:
# List the enable protocol levels with which clients will be able to
# connect.  Disable SSLv2 access by default:
SSLProtocol all -SSLv2

SSLCipherSuite HIGH:MEDIUM:!aNULL:!MD5:!SEED:!IDEA


SSLCertificateFile /etc/httpd/conf/server.crt

SSLCertificateKeyFile /etc/httpd/conf/server.key

SSLCertificateChainFile /etc/httpd/conf/ca.crt

<Files ~ "\.(cgi|shtml|phtml|php3?)$">
    SSLOptions +StdEnvVars
</Files>
<Directory "/var/www/cgi-bin">
    SSLOptions +StdEnvVars
</Directory>


BrowserMatch "MSIE [2-5]" \
         nokeepalive ssl-unclean-shutdown \
         downgrade-1.0 force-response-1.0

#   Per-Server Logging:
#   The home of a custom SSL log file. Use this when you want a
#   compact non-error SSL logfile on a virtual host basis.
CustomLog logs/ssl_request_log \
          "%t %h %{SSL_PROTOCOL}x %{SSL_CIPHER}x \"%r\" %b"

</VirtualHost>
附件:ssl.conf
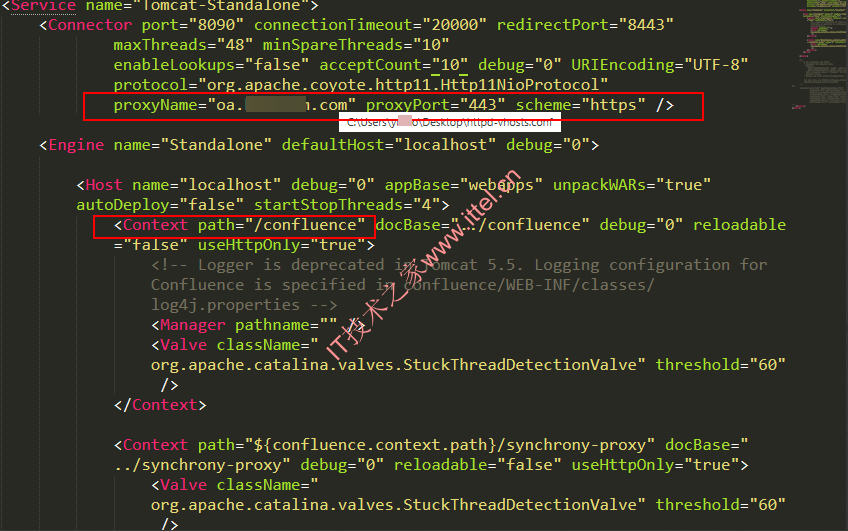
(4)添加虚拟目录
修改/home/atlassian/confluence/conf/server.xml
(5)重启所有节点并进行测试
# /home/atlassian/confluence/bin/stop-confluence.sh
# /home/atlassian/confluence/bin/start-confluence.sh
(6)修改confluence URL

六 协同编辑开启
1.设置Synchrony
协作编辑需要Synchrony,它作为一个单独的进程运行。
拷贝下面配置服务包到每个节点上,并解压,这里解压到/home/Synchrony并给与权限

2、修改启动文件
vi /home/Synchrony/start-sync.sh
# Enter your base url
#confluence主站地址
CONFLUENCE_BASEURL="https://oa.test.com"

# Enter the log location (create the directory & grant permissions to $USER first)
SYNCHRONY_LOG="/home/Synchrony/synchrony-logs/atlassian-synchrony.log"

# This server's IP
# 本机监听IP
SYNCHRONY_SERVER_IP="10.5.0.*"

# Copy these from your confluence server > /confluence-home/confluence.cfg.xml
#/home/atlassian/application-data/confluence/confluence.cfg.xml配置文件中有
JWT_PRIVATE_KEY="MIICdgIBADA此处省略..7Cn7ttnA=="
JWT_PUBLIC_KEY="MIGfMA此处省略..NYoQIDAQAB

#数据库URL和账号密码
DATABASE_URL="jdbc:jtds:sqlserver://10.2.2.**:1433/confluence_cluster"
DATABASE_USER="confluence"
DATABASE_PASSWORD="*"

# Location of the synchrony-standalone.jar and database driver jar
# You must copy these over from the confluence server to the directory of your choice
#数据库驱动包和协同编辑jar包
DATABASE_DRIVER_PATH="/home/Synchrony/jtds-1.3.1.jar"
SYNCHRONY_CLASSPATH="/home/Synchrony/synchrony-standalone.jar"

# Load balancer contect path, leave as "/synchrony"
SYNCHRONY_CONTEXT_PATH="/synchrony"

# This combines two variables above to create the synchrony service url
SYNCHRONY_SERVICE_URL=$CONFLUENCE_BASEURL$SYNCHRONY_CONTEXT_PATH

# this is where you can setup the jvm startup parameters
_RUNJAVA="/home/atlassian/confluence/jre/bin/java -Xss2048k -Xmx1024m"

# In this section, set the synchrony cluster member IP's using comma separated like so:
# -Dcluster.join.tcpip.members=192.168.2.1,192.168.2.2
# Don't change the other properties without consulting support first
SYNCHRONY_PROPERTIES="\
-classpath ${SYNCHRONY_CLASSPATH}:${DATABASE_DRIVER_PATH} \
-Dsynchrony.cluster.impl=hazelcast-btf \
-Dsynchrony.port=8091 \
-Dcluster.listen.port=5701 \
-Dsynchrony.cluster.base.port=25500 \
-Dcluster.join.type=tcpip \
-Dcluster.join.tcpip.members=10.5.0.90,10.5.0.91,10.5.0.92 \
-Dsynchrony.context.path=${SYNCHRONY_CONTEXT_PATH} \
-Dsynchrony.cluster.bind=${SYNCHRONY_SERVER_IP} \
-Dsynchrony.bind=${SYNCHRONY_SERVER_IP} \
-Dcluster.interfaces=${SYNCHRONY_SERVER_IP} \
-Dsynchrony.service.url=${SYNCHRONY_SERVICE_URL} \
-Dreza.service.url=${SYNCHRONY_SERVICE_URL} \
-Djwt.private.key=${JWT_PRIVATE_KEY} \
-Djwt.public.key=${JWT_PUBLIC_KEY} \
-Dsynchrony.database.url=${DATABASE_URL} \
-Dsynchrony.database.username=${DATABASE_USER} \
-Dsynchrony.database.password=${DATABASE_PASSWORD} \
-Djava.net.preferIPv4Stack=true \
-Dip.whitelist=127.0.0.1,localhost,10.5.0.90,10.5.0.91,10.5.0.92,10.0.0.222"

# Synchrony system properties:
# https://confluence.atlassian.com/doc/configuring-synchrony-for-data-center-858772125.html

/bin/su -m $USER -c "(${_RUNJAVA} ${SYNCHRONY_PROPERTIES} synchrony.core sql & ) >> ${SYNCHRONY_LOG} 2>&1"

# Getting the PID of the process
PID=`ps aux | grep -i synchrony.cluster | grep -i java | awk  -F '[ ]*' '{print $2}'`
echo "$PID" > $SYNCHRONY_PID
echo "$(timestamp) Started Synchrony service with PID: $PID" >> $SYNCHRONY_LOG
echo "Starting Synchrony..."
echo "Binding: $SYNCHRONY_SERVER_IP:8091"
echo "Synchrony Logs: $SYNCHRONY_LOG"
echo "Please wait 30 seconds, then check this heartbeat URL in your browser for an 'OK': $SYNCHRONY_SERVICE_URL/heartbeat"
在10.5.0.90上就配置监听地址为10.5.0.90
详细参数见:https://confluence.atlassian.com/conf63/configuring-synchrony-for-data-center-929730118.html
3、启动协同编辑
/home/Synchrony/start-sync.sh #启动
/home/Synchrony/stop-sync.sh #关闭
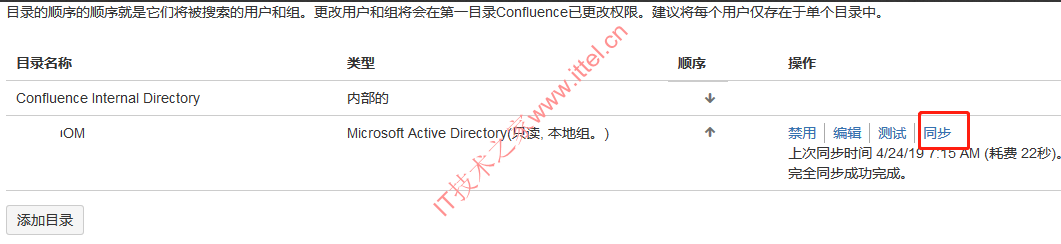
七 LDAP集成
1、打开用户目录

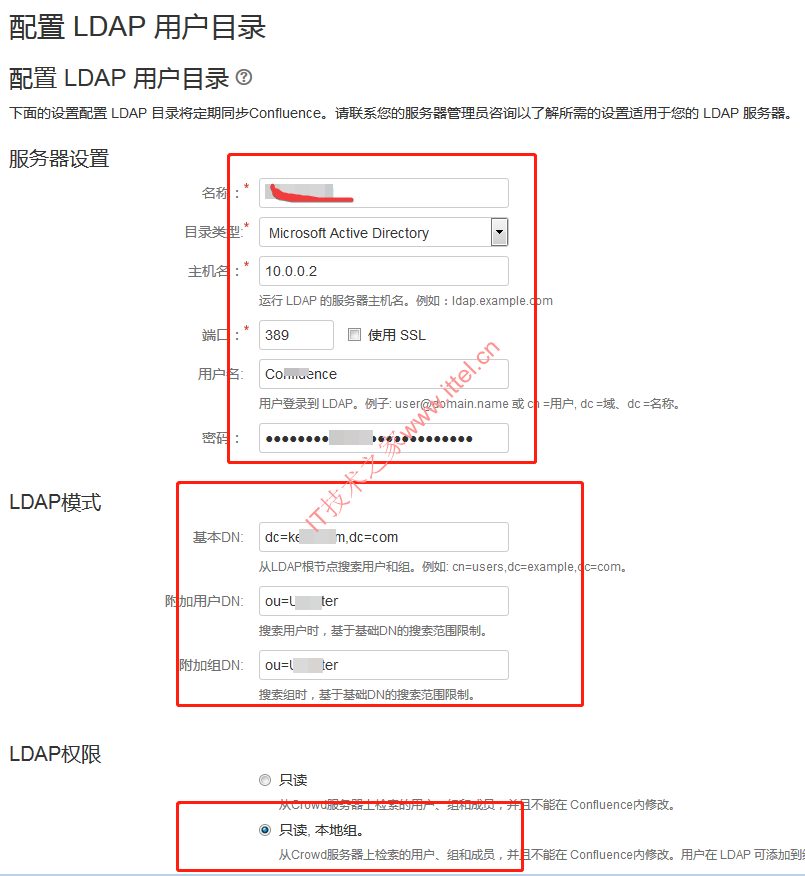
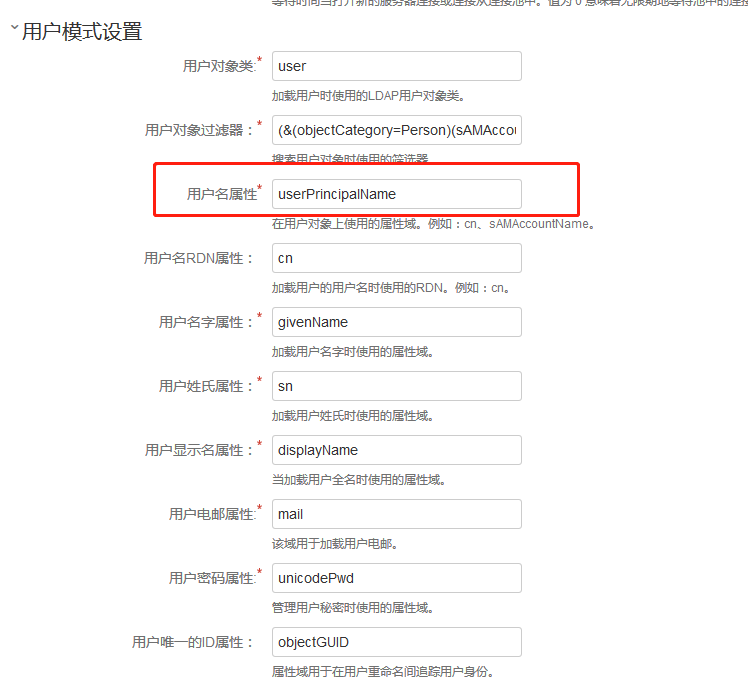
2、点击添加目录

3、按照图片添加信息
用户名:confluence
密码:*
4、进行同步
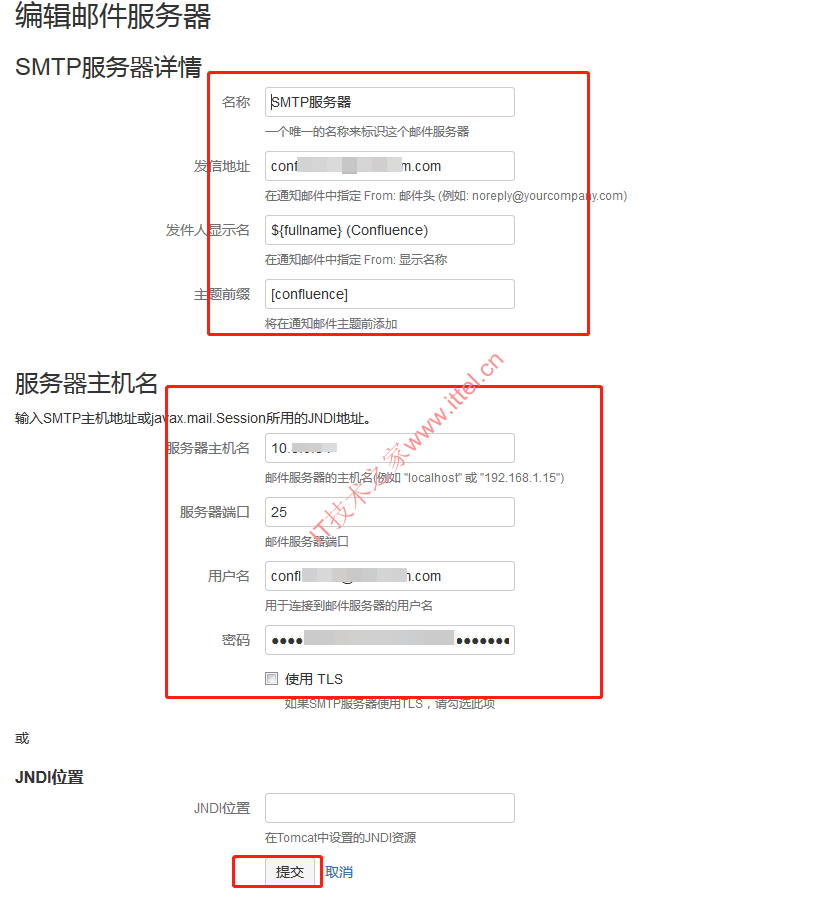
七 配置邮件服务器
1、在邮件服务器中添加SMTP邮件服务器

2、按如下信息添加邮件服务器
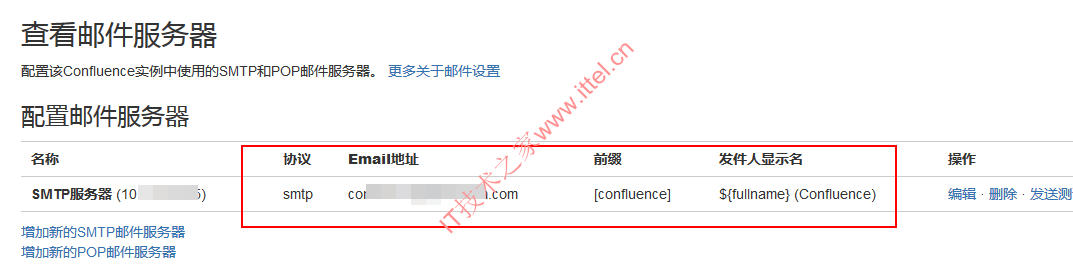
3、确认邮件服务器信息
八、业务备份和还原
手动备份和还原
备份:
业务备份:
拷贝/home/confluence-cluster/backups目录下备份文件到备份服务器即可
数据库备份:
无需备份,文件和页面都在上面备份文件中。
还原:
业务还原:
拷贝备份文件到/home/confluence-cluster/restore目录中
然后点击“一般配置”,“备份还原”,选中还原。
九、FAQ
借鉴文章:
confluence 数据中心版安装:https://confluence.atlassian.com/conf63/installing-confluence-data-center-929729992.html
协同编辑:https://confluence.atlassian.com/conf63/configuring-synchrony-for-data-center-929730118.html
APACHE文档:http://httpd.apache.org/docs/2.4/zh-cn/mod/mod_proxy.html
http://httpd.apache.org/docs/2.4/zh-cn/rewrite/vhosts.html
http://httpd.apache.org/docs/2.4/zh-cn/mod/mod_proxy_balancer.html
http://httpd.apache.org/docs/2.4/en/mod/mod_headers.html
服务器版授权详情:
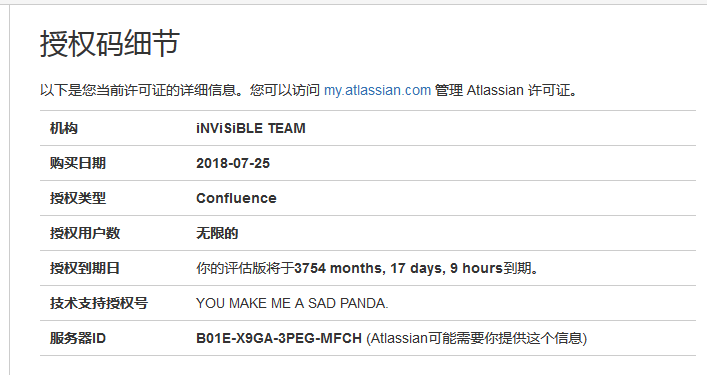
数据中心版授权详情:

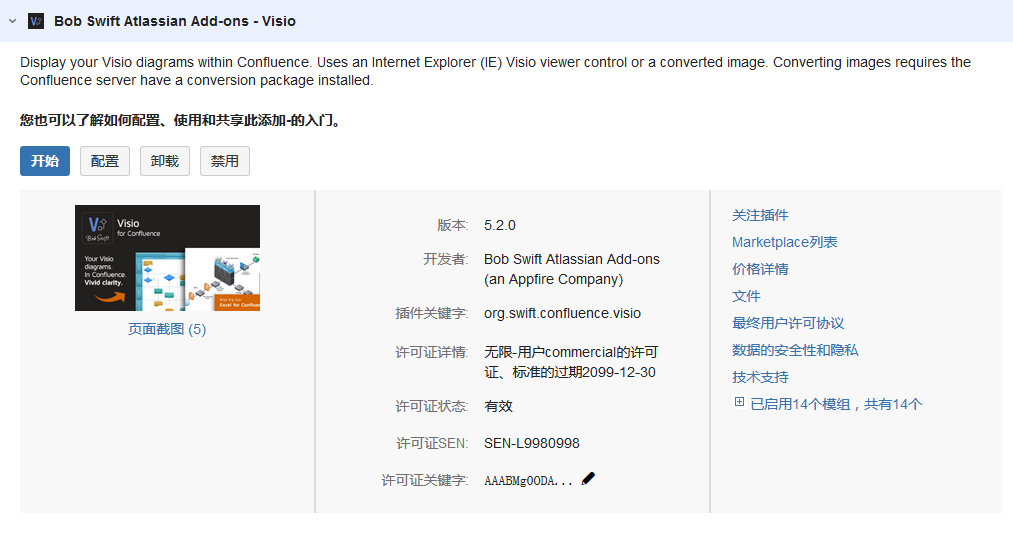
插件授权信息:
 微信扫一扫打赏
 支付宝扫一扫打赏

大佬,confluence8 版本的cas 有教程不,升级后cas不能用了
暂时没有
大佬,交流一下哈,我这一直没弄好呢
可以的
太牛皮了